The Great Filament Mystery: Cracking the Code on 3D Printing Material Use
(How Much Material Do You Use When 3d Printing)
Picture this. You hit “print” on a 3D model of a tiny robot. Hours later, you’ve got a cool toy but also an empty spool. Wait, did that little bot really eat all your filament? Welcome to the wild world of 3D printing material math. Let’s break down what’s going on—no PhD required.
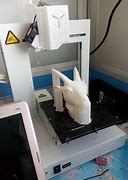
First, size matters. Printing a life-size T-rex skull? You’ll need enough plastic to fill a bathtub. Making a earring? Maybe a spoonful. The bigger the object, the more material it eats. But here’s the kicker: it’s not just about outer size. What’s inside counts too.
Think of infill like a chocolate bar. Solid infill is like a brick of chocolate—no gaps, just pure material. But most prints don’t need that. Using 20% infill? Now it’s a chocolate bar with air pockets. Less material, same shape. This is where you save filament without turning your print into a noodle.
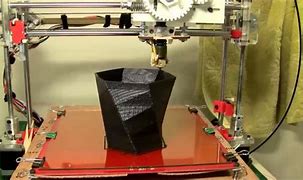
Then there’s the sneaky stuff: supports. Printing a bridge or a overhang? The printer needs scaffolding to hold things up. These supports get tossed after printing. It’s like building a sandcastle with molds—you use extra sand to shape it, then knock the molds away. Supports can double your material use fast. Slicer software helps guess how much, but it’s not perfect.
Failed prints are the silent filament killers. A print that warps, snaps, or turns into spaghetti? That’s material straight to the trash. Even pros deal with this. A 10-hour print failing at hour nine isn’t just annoying—it’s a filament funeral.
So how do you predict material use? Slicer software gives estimates, but real life messes with math. Humidity can make filament brittle. Temperature changes might cause jams. A “200-gram” project could become 220 grams fast. Always buy a little extra. Running out mid-print is like pancake batter drying up halfway—you’re stuck.
Want to save material? Try these tricks. Drop infill where strength isn’t key. A decorative vase doesn’t need 50% infill. Use tree supports—they’re like bonsai versions of normal supports, using less material. Print hollow parts if possible. Calibrate your printer so it doesn’t ooze extra plastic.
Let’s talk numbers. A standard 6-inch action figure might use 50 grams of filament. A phone case? Around 80 grams. A full-size helmet? Buckle up—that’s 500 grams or more. But these are rough guesses. Your printer’s mood, filament type, and even room temperature tweak the numbers.
One user printed a set of chess pieces. The slicer said 150 grams. Reality? 180 grams. Why? Mini supports under the knights’ heads and a few redos. Another printed a garden gnome. Estimated 300 grams, actual 275. Sometimes you win.
At the end of the day, 3D printing is part science, part art. You learn by doing. Track your prints. Note how much filament they really use. Soon, you’ll eyeball a model and guess the material like a pirate guessing the weight of a gold bar.
(How Much Material Do You Use When 3d Printing)
Material use isn’t just about cost—it’s time, waste, and sanity. Master it, and you’ll print smarter, not harder. Now go forth. Experiment. And maybe keep a backup spool handy.
Inquiry us
if you want to want to know more, please feel free to contact us. (nanotrun@yahoo.com)